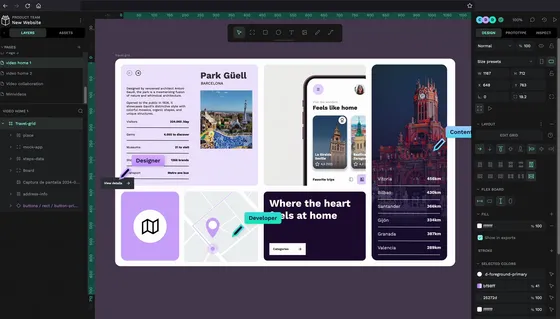
New York City Neighborhood Map: Foley Square: BOEDOET FREE YORK 63, Financial District: SEPTEMBER 11 ATTACKS, Tribeca: NPC normies with literally 0 personality, Chinatown: Chinese men playing chess, Little Italy: Tourists Looking for Pasta, Two Bridges: Still Affordable + Dumplings, Nolita: Mafia Zone , Hudson Square: "Cool" Dads and SoulCycle Moms, Essex Market: Art Girls, Brooklyn Heights-Cobble Hill, Brooklyn: Manhattan bridge photo spot, New York University: NYU Students A feature on modern systems synchronises the volume level between a Bluetooth headset and whatever you're connecting it to, so that if you press the volume buttons on your headset your system volume will go up and down accordingly. I'm not sure what it's actually called, but I mostly see it referred to as "absolute volume".
Unfortunately, with my headphones, even the very lowest volume setting is uncomfortably loud, so I turn absolute volume off wherever possible. I only just figured out how to do this using Pipewire and WirePlumber (based on this Manjaro forum post), so I'm posting a short guide here for posterity.
1. Make sure you are using both Pipewire and WirePlumber. You might have to follow the forum post above if you're using Pipewire Media Session.
2. If it doesn't exist, make the directory `/etc/wireplumber/bluetooth.lua.d/`. If you only want this to apply to one user instead of the whole system, make `~/.config/wireplumber/bluetooth.lua.d/` instead.
3. Copy `/usr/share/wireplumber/bluetooth.lua.d/50-bluez-config.lua` to the directory you made in step 2.
4. Edit `50-bluez-config.lua`, changing the line `--["bluez5.enable-hw-volume"] = true,` to `["bluez5.enable-hw-volume"] = false,`. (make sure to remove `--` to uncomment the line)
5. Restart the system and disconnect and reconnect your Bluetooth headphones.
Your PC and headphones should now have separate volume levels, giving you far more fine grained control without having to lower the volume in every program individually. So ive been running PI Coding Agent with a the Qwen3.6 35b a3b q4\_k\_xl model for some real projects and honestly didn't expect it to work this good.
The real game changer was the plan-first skill file i created. Like it actualy follows what you say and does everything step by step without going off the rails. Used it on actual production stuff and it held up.
Here's the skill file if anyone wants to try it:
---
name: plan-first
description: Structured planning workflow for any coding task. Use at the start of every new feature, bug fix, refactor, or implementation request. Analyzes the project, asks up to 5 clarifying questions, creates a TODO.md, gets user approval, then executes task by task. Never writes code before a plan is approved.
---
# Plan-First Workflow
## Rules
- NEVER write code, create files, or run commands before a TODO.md is approved.
- NEVER assume missing information. Ask instead.
- NEVER skip steps. Follow phases in order.
- NEVER go off-plan. If new work is discovered, add it to TODO.md and ask for approval before doing it.
---
## Phase 1 — Analyze the Project
Read the project silently before asking anything. Check:
1. Directory structure (top 2 levels)
2. `package.json`, `pubspec.yaml`, `go.mod`, `requirements.txt`, `Cargo.toml`, `pom.xml`, or equivalent
3. Existing dependencies and their versions
4. Build system and scripts (`Makefile`, `scripts/`, CI config)
5. `README.md` or `README.*`
6. Any existing `TODO.md`, `TASKS.md`, `.todo`, or open issue files
Do not output analysis results unless directly relevant to your questions.
---
## Phase 2 — Ask Clarifying Questions (One Round Only)
After analysis, identify gaps that would block correct implementation.
- Ask **at most 5 questions** in a single message.
- Only ask what is **critical and cannot be inferred** from the codebase.
- Number the questions.
- Do not ask about things already answerable from the project files.
- Do not split into multiple rounds — this is your only chance to ask.
Example format:
```
Before I create the plan, I need a few things clarified:
1. Should the new endpoint require authentication?
2. Is there a preferred database (the project has both SQLite and Postgres configs)?
3. Should existing tests be updated, or only new ones added?
```
Wait for the user's response before proceeding.
---
## Phase 3 — Create TODO.md
Using the analysis and the user's answers, write a `TODO.md` file in the project root.
### TODO.md Structure
```markdown
# TODO
## Goal
One sentence describing what will be built or fixed.
## Tasks
### 1. <Phase Name>
- [ ] <Concrete, measurable action>
- [ ] <Concrete, measurable action>
### 2. <Phase Name>
- [ ] <Concrete, measurable action>
- [ ] <Concrete, measurable action>
## Notes
Any constraints, decisions, or known risks recorded here.
```
### Requirements
- Tasks must be **small and independently verifiable** (one logical change each).
- Order tasks by **dependency** (prerequisites first).
- Each task must be checkable as done/not done.
- No vague items like "fix things" or "improve code".
After writing the file, show the full contents to the user and ask:
```
I've created TODO.md. Does this plan look correct?
Reply YES to start, or tell me what to change.
```
---
## Phase 4 — Revision Loop (if needed)
If the user requests changes:
1. Ask targeted follow-up questions to resolve the disagreement.
2. Rewrite `TODO.md`.
3. Show the updated plan and ask for approval again.
Repeat until the user approves.
---
## Phase 5 — Execute the Plan
Once approved:
1. Work through tasks **in order**, one at a time.
2. After completing each task, mark it done in `TODO.md`:
- Change `- [ ]` to `- [x]`
3. State which task you are starting before you begin it.
4. Do not start the next task until the current one is complete.
5. Do not perform any work not listed in `TODO.md`.
If you discover that an unlisted task is required:
- Stop.
- Add it to `TODO.md` under a `## Discovered Tasks` section.
- Tell the user what was found and why it is needed.
- Ask for approval before continuing.
When all tasks are marked `[x]`, write:
```
All tasks in TODO.md are complete.
```
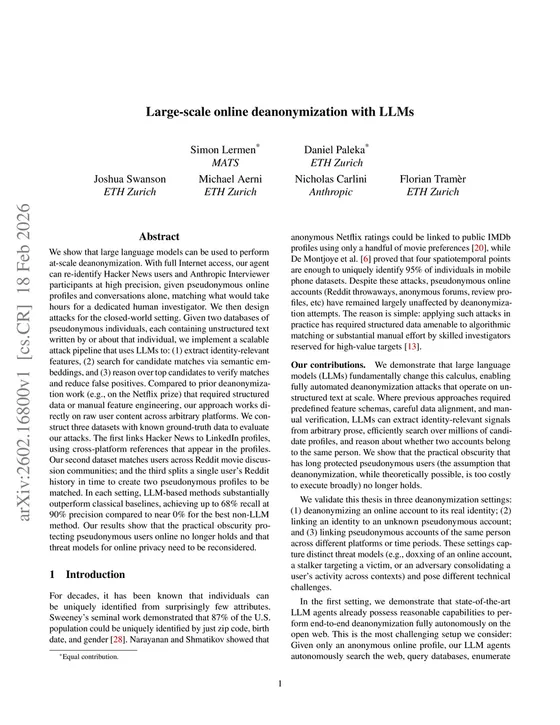
Defenetly worth trying if you havent already. Local models have come a long way fr View recent discussion. Abstract: We show that large language models can be used to perform at-scale deanonymization. With full Internet access, our agent can re-identify Hacker News users and Anthropic Interviewer participants at high precision, given pseudonymous online profiles and conversations alone, matching what would take hours for a dedicated human investigator. We then design attacks for the closed-world setting. Given two databases of pseudonymous individuals, each containing unstructured text written by or about that individual, we implement a scalable attack pipeline that uses LLMs to: (1) extract identity-relevant features, (2) search for candidate matches via semantic embeddings, and (3) reason over top candidates to verify matches and reduce false positives. Compared to classical deanonymization work (e.g., on the Netflix prize) that required structured data, our approach works directly on raw user content across arbitrary platforms. We construct three datasets with known ground-truth data to evaluate our attacks. The first links Hacker News to LinkedIn profiles, using cross-platform references that appear in the profiles. Our second dataset matches users across Reddit movie discussion communities; and the third splits a single user's Reddit history in time to create two pseudonymous profiles to be matched. In each setting, LLM-based methods substantially outperform classical baselines, achieving up to 68% recall at 90% precision compared to near 0% for the best non-LLM method. Our results show that the practical obscurity protecting pseudonymous users online no longer holds and that threat models for online privacy need to be reconsidered. Hey!
I wrote Tuxedo last time about the same issue, and they advised me to reseat/re-insert the ribbon cable that goes from the mainboard to the board at the left side, where the headphone jack is.
Looks like a great place for a failure, because of how many sharp turns the ribbon cable has.
Of course, if the cable is bad, it would need to be replaced, but I think there's enough possibility for intermittent contact in the ZIF connector -- worth trying, since after I reseated mine the issue stopped being reproduceable.
**CAUTION: If you don't have experience working with small electronic parts, do not proceed beyound this point.**
**Note:** *It's also a good idea to use an antistatic strip or at least to ground yourself to the metal frame of the USB port, periodically.*
**What you will need**
1. A good Philips size 0 screwdriver
2. A prying blade to unlock the case latches without damaging it
3. A (preferably plastic) small prying tool or a small flat screwdriver, to seat the ribbon cable back in. It can be very difficult to seat it in the connector otherwise, since the cable is angled so close to the connector.
4. A camera/phone to make the photo of the board before you begin work. :)
**Disassembling the laptop**
1. Turn the laptop off
2. On the bottom of the laptop there are 5 screws, another 2 are on the angled face on the front side.
3. Once you have screwed out these screws, you'll have to open the laptop. Get a prying blade and work it gently to separate the bottom cover, starting with the back side, where the cooling outlets are. There will be two latches that you have to carefully unlatch.
4. Once you have separated the back side, pull up the bottom panel and set it aside.
5. Disconnect the battery. There are two powered circuits inside the laptop: the main battery and the clock/CMOS battery. You need to disconnect them both.
6. First, disconnect the main battery. Find the ribbon cable running from the battery to the mainboard. Using a non-conductive prying tool, pull up the piece of transparent adhesive that holds the battery connector to the MB from one side, and disconnect it gently.
7. Above this connector on the MB will be a small connector with two wires running to it. This is the clock battery. Pull it out carefully.
8. Find the SSD and remove it from the motherboard slot -- it will make it easier to reach the ribbon cable and the fan screws.
Now you have to work on the ribbon cable connecting the MB and the audio/card reader board (see picture). This is located near the right fan.
https://preview.redd.it/1lg7rf52bzub1.jpeg?width=3468&format=pjpg&auto=webp&s=e5a6dd9d85bdbe519993f58c9d4fc228d4025ad5
1. Pull the lever (the black part) of the leftmost ZIF connector upwards carefully, this will release the ribbon cable.
2. Pull the ribbon cable out
3. To reach the right side of the cable you will need to remove the right fan.
4. Pull the ribbon cable upwards slightly to free the working area.
5. Unscrew the three screws holding the fan to the base assembly.
6. Pull the fan out from its duct and set it aside. **Note:** *Beware of the red RTC battery cable. You must reseal the adhesive holding it back to the base assembly after you finish assembling the fan back, or else the RTC battery cable will dangle and potentically could get in the way of the fan.*
7. Now you can access the right side of the ribbon cable. Unlock the ZIF connector lever and pull the cable completely out.
**Reseat the ribbon cable and assemble the laptop back**
1. Carefully insert the ribbon cable back into the right side connector. **Note:** *It's best to use a small prying tool to reach behind the cable and nudge it carefully into the connector to ensure it's inserted fully and evenly.* Close the ZIF connector lever.
2. Insert the fan into its duct and screw in the three screws holding it.
3. Glue the adhesive holding the RTC battery cable back to the base assembly.
4. Now insert the left side of the ribbon cable the same way and close the ZIF lever.
5. Insert the RTC battery connector back into the motherboard.
6. Screw down the SSD into the M.2 slot. Make sure to use the right screw -- check against the case screws, there should be one short screw for the SSD and two longer small screws that were holding the front face of the bottom cover.
7. Carefully insert the main battery connector and reseal the adhesive holding it to the MB.
8. Close the bottom cover. Insert the front part first, then proceed to close it towards the back, making sure the two latches at the back are closed fully -- or else you will have a small bulge because the two halves didn't snap completely in.
9. Power up your laptop. Test and verify that everything works (SSD, sound, cooling, headphone jack...)
10. Power down your laptop and proceed to closing the bottom cover completely.
11. Screw down the bottom screws.
12. Screw down the front face screws (the two short ones). Run (1991,) Film in English, Patrick Dempsey, Kelly Preston, Ken Pogue, | Full, Classic, Movie, HD,#ClassicMovies,#OldHollywood,#GoldenAgeCinema,#VintageFilm...
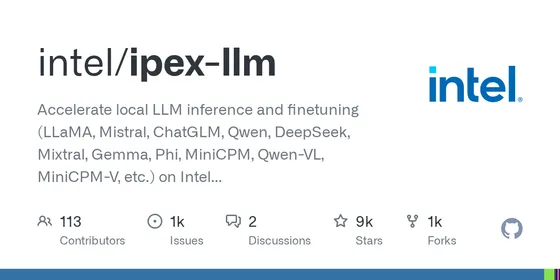
GitHub - intel/ipex-llm: Accelerate local LLM inference and finetuning (LLaMA, Mistral, ChatGLM, Qwen, DeepSeek, Mixtral, Gemma, Phi, MiniCPM, Qwen-VL, MiniCPM-V, etc.) on Intel XPU (e.g., local PC with iGPU and NPU, discrete GPU such as Arc, Flex and Max); seamlessly integrate with llama.cpp, Ollama, HuggingFace, LangChain, LlamaIndex, vLLM, DeepSpeed, Axolotl, etc. Accelerate local LLM inference and finetuning (LLaMA, Mistral, ChatGLM, Qwen, DeepSeek, Mixtral, Gemma, Phi, MiniCPM, Qwen-VL, MiniCPM-V, etc.) on Intel XPU (e.g., local PC with iGPU and NPU, discr...
GitHub - intel/ipex-llm: Accelerate local LLM inference and finetuning (LLaMA, Mistral, ChatGLM, Qwen, DeepSeek, Mixtral, Gemma, Phi, MiniCPM, Qwen-VL, MiniCPM-V, etc.) on Intel XPU (e.g., local PC with iGPU and NPU, discrete GPU such as Arc, Flex and Max); seamlessly integrate with llama.cpp, Ollama, HuggingFace, LangChain, LlamaIndex, vLLM, DeepSpeed, Axolotl, etc. Accelerate local LLM inference and finetuning (LLaMA, Mistral, ChatGLM, Qwen, DeepSeek, Mixtral, Gemma, Phi, MiniCPM, Qwen-VL, MiniCPM-V, etc.) on Intel XPU (e.g., local PC with iGPU and NPU, discr... GitHub - Helicone/helicone: 🧊 Open source LLM-Observability Platform for Developers. One-line integration for monitoring, metrics, evals, agent tracing, prompt management, playground, etc. Supports OpenAI SDK, Vercel AI SDK, Anthropic SDK, LiteLLM, LLamaIndex, LangChain, and more. 🍓 YC W23